✅ Step 1: Create a New Agent
- Open Copilot Studio.
- Navigate to Agents and click Create blank agent.
✅ Step 2: Configure Agent Details
In the ‘Details’ section, click ‘Edit’.
- Name:
Inbox Summary to Teams - Description:
Monitors an email inbox, summarizes incoming messages, and posts the summary as a Teams chat message. - Click Save.
✅ Step 3: Specify Agent Instructions
In the ‘Instructions’ section, click ‘Edit’.
- Copy and paste the following instructions into the Instructions field from here.
- Click Save.
✅ Step 4: Select Agent’s Model
- Choose GPT-4.1 (Default) under Select your agent’s model.
✅ Step 5: Add the Tool: Post message in a chat or channel
✅ Step 5.1: Start Tool Creation
- Under Tools, click Add tool.
- Select the tool:
Post message in a chat or channel
✅ Step 5.2: Fill in Tool Details
- Name:
Post message in a chat or channel - Description:
Posts a message to a chat or channel - Tool:
Select Microsoft Teams – Post message in a chat or channel. - Connection:
Ensure your Teams connection is active (green check mark). - Available to:
Add the agent or feature (e.g.,Inbox Summary to Teams).
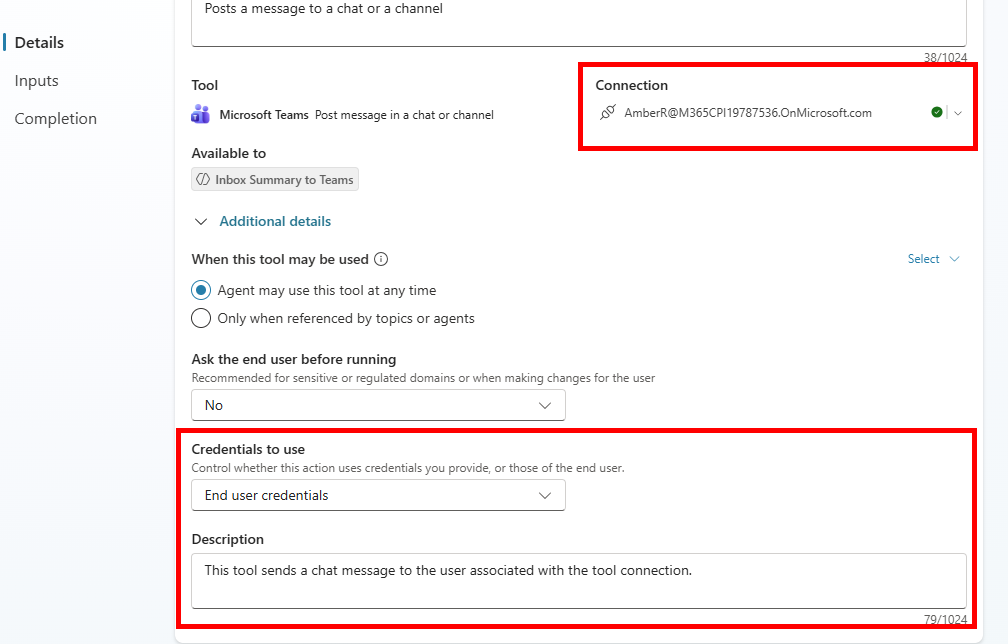
✅ Step 5.3: Configure Additional Details
- When this tool may be used:
Select Agent may use this tool at any time. - Coordinates to use:
Choose End user coordinate. - Description for orchestration:
This tool sends a chat message to the user associated with the tool connection.
✅ Step 5.4: Define Inputs
| Input Name | Fill Using | Value |
|---|---|---|
| Post as | Custom value | Flow bot |
| Post in | Custom value | Chat with Flow bot |
| Recipient | Dynamically fill with AI | (leave as is) |
| Message | Dynamically fill with AI | (leave as is) |
| IsAlert | Dynamically fill with AI | (leave as is) |
✅ Step 5.5: Completion Settings
- After running:
Select Don’t respond (default). - Click Advanced if you need extra completion logic (optional).
✅ Step 5.6: Save and Validate
- Click Save.
- Test the tool by triggering it in your agent to confirm messages post correctly in Teams.
Note: The ‘Credentials to use’ are set to ‘End user credentials’ to ensure the agent uses the connection of the user interacting with it. If enabled by the admin, there is the option to use ‘Maker-provided credentials’. This should be selected only if the agent is intended to always use a specific connection regardless of the end user. Note that all interactions will be in the context of the maker’s connection - which may have unintended consequences when the agent is shared with others. That is, instead of sending a message to the end user’s Teams chat, it would always send to the maker’s Teams chat. Additionally, when the access token for the maker’s connection expires, the agent will fail until the maker renews the connection.
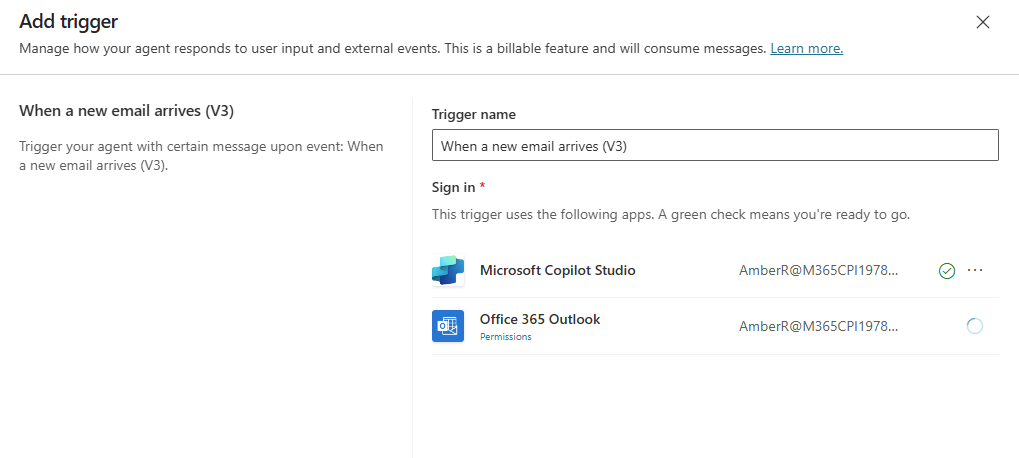
✅ Step 6: Add Trigger
- Under Triggers, click Add trigger.
- Select:
When a new email arrives (V3)
(This ensures the agent activates whenever a new email is received.)Note: No changes are needed for trigger configuration; use default settings.
- Click Save.
Note: The connection settings for the trigger have your credentials associated with Copilot Studio and Outlook in order to read your emails. When sharing this agent with others, they will need to set up their own connection to access their email inbox.
✅ Step 7: Review Analytics (Optional)
- After setup, you can monitor:
- Runs
- Successful runs
- Average duration (Shown in the Analytics section.)
✅ Step 8: Save and Test
- Click Publish.
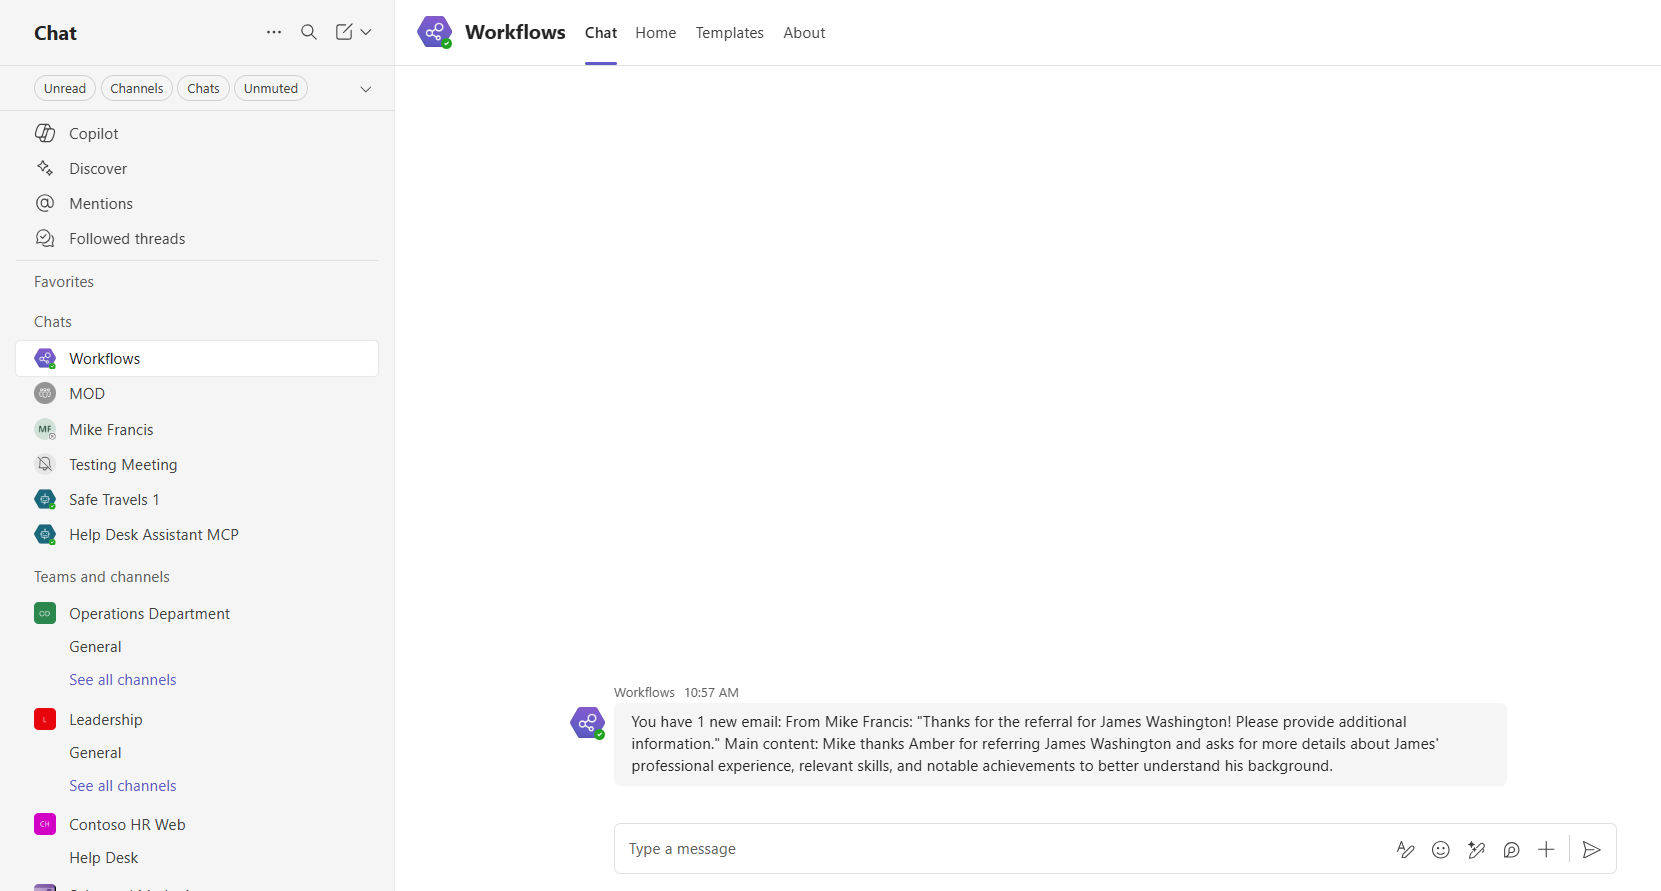
- Test the agent by sending an email yourself to confirm it summarizes the inbox and posts the summary to Teams. Include some content that can be summarized by the agent
You should see after a few seconds the email will be detected and a message will posted to your teams chat it will come from the Flow bot (Workflow).
It should look something like this:
✅ Key Components from Images
- Agent Name: Inbox Summary to Teams
- Tool Added: Post message in a chat or channel
- Trigger: When a new email arrives (V3)
- Model: GPT-4.1 (Default)